
Instructions
GETTING STARTED
|
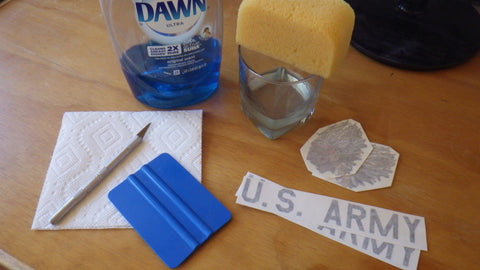
Before you apply your graphics, it is recommended that you clean the areas your graphics will be going on. I typically will use rubbing alcohol or Windex, to remove any dirt, grease, etc. on the surface of the model. Just make sure whatever you are using will be compatible with the surface of your model. Some items that may be helpful during the application process will include scissors, sharp X-Acto knife, soapy water solution, sponge/towel and a squeege (a credit card will also suffice). Your graphics have been shipped with transfer tape on top, to aide in the application process. This is the semi-transparent carrier paper. This will prevent the graphics from stretching during application, as well as keep any cut numbers/letters together, so you don’t have to apply each one individually! You can either apply your graphics wet or dry. Dry is quick and easy, however, can lead to bubbles or a mis-postioned graphic by accident. Applying the graphics wet does take a bit longer, but ensures you’ll have plenty of time to align the graphics before they stick. I will often apply small simple graphics dry, and larger graphics wet. This is all personal preference, and can take a bit of personal experience to decide what is best for you and your application. |
APPLICATION
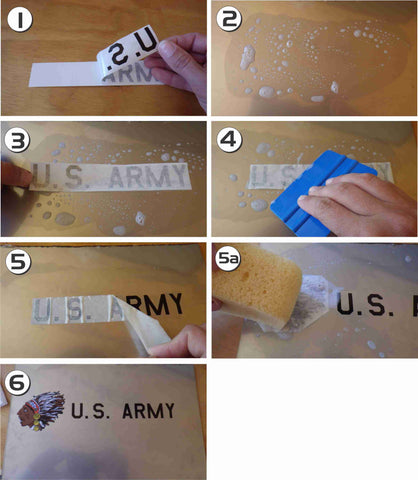 |
Okay, lets get started. If you’ve decided to go with the wet application method, you’ll need to mix up a soapy water solution. I use 2 drops of a liquid dishwashing detergent to a cup of luke warm water. If you are applying your graphics outside, I suggest picking a warmish day. If it’s too cold, the graphics will have trouble sticking, and if it’s too warm, they’ll stick a lot quicker than you might want them to! Between 60-85 degrees is a comfortable working temp. 1. You’ll want to remove the backing from your graphic. This is the heavier carrier paper on the back. Once that is off you can discard the backing. 2. If using the wet method, then sponge on some soapy water to the desired area on your model. If not, go on to step 3. 3. Place your graphic on the model. If using the wet method, you can slide the graphic around until it is placed just right. If using the dry method, take care to get it positioned correctly. 4. Squeege down the graphic. If using the wet method, make sure all the moisture is out. If you are in a humid area, you might even need to let the graphic set for a little while to dry out to ensure good adhesion. 5. After you are sure the graphic is stuck down, it is time to remove the transfer tape. I like to slowly peel the tape up at about a 45 degree angle. If you find the transfer tape is tricky to come up, I suggest wetting the top of the transfer tape (5a) with your soapy water solution. This helps break down the adhesive in the transfer tape and makes it much easier to remove. 6. You’re done! |
CLEAR COAT
| If you desire to, you can apply a clear coat on top of your new graphics after they have been applied. I have used a variety of different clears, all with good luck....the only exception was Sig Butyrate Dope. The Sig Dope caused a small amount of wrinkling/shrinkage. If you have any doubts, do a sample before clearing your graphics. I’ll gladly send some scrap vinyl with your order for free on request, so you don’t have to risk damaging your new graphics. I do suggest letting your model sit for 24 hours after application before you clear coat your model, if you used the wet application method. This will ensure all the moisture is gone, so you don’t seal it in with your clear! If your model is nitro powered, you will want to clear coat any printed graphics to prevent the ink from being damaged from any nitro residue. Our vinyl is fuel proof, but the ink is not. |
TROUBLESHOOTING
 |
Despite your best efforts, some times a dreaded bubble will appear in your applied graphics. This usually is not a big problem. Sometimes all it will take is a sunny windowsill. Stick your model by a window getting sun, and very often those pesky bubbles will go right away all on their own. If that doesn’t do the trick, try using a sharp X-Acto blade. Pierce the bubble, to put a tiny hole in the vinyl. Then, gently burnish the air/moisture out towards the center, where you pierced the vinyl. |